|
 What Is ThingLink? What Is ThingLink?
ThingLink
is an application that lets users easily add digital content to digital
images and effortlessly share via email or social media. With ThingLink,
images come alive.
Why Should I Use ThingLink in My Classroom?
We all know a picture is worth a thousand words. Who has not
experienced that “ah-ha” moment of understanding a concept when shown a
visual representation of it? With ThingLink, students add their own
words to a photo, or add links to online sources, such as dictionaries,
maps, sounds, or videos, that elaborate on and explain their image.
Who Can Use ThingLink?
Basically, this is an application that can be used by students
at all levels and for all subjects. For example, primary students could
label a photo of a basket of fruit by simply adding the name of the
fruit in a tag, intermediate level students could add links to an online
dictionary definition of the fruit, and advanced level students might
explain through digital content the geographic regions each fruit comes
from.
Teachers can use ThingLink as an innovative way to deliver
instruction by making a ThingLink that contains pertinent task
information, which could be projected for the class. With an interactive
whiteboard, students can also participate in uncovering the knowledge
contained in the graphic.
Why Should Language Learners Use It?
Using ThingLink encourages students to read, write, view,
listen, explain, research, link, connect, create, and share a variety of
multimedia projects. Simple tasks could be to:
- label items in a picture
- describe the action in a photo
- identify/answer who, what, when, where, why, how for the image
- design a stand-alone digital presentation on the topic shown
- distribute task instructions
ThingLink works on computers, tablets and smartphones across
Windows, Apple, and Android operating systems. A cloud-based
application, ThingLink saves automatically when content is added or
edited.
With an interactive whiteboard, a ThingLink becomes a super
visual aid for use in oral presentations. Sharing the ThingLink in an
online discussion forum or blog gives each student the chance to share
their 21st-century digital project.
How Do I Get Started?
Simply go to ThingLink and create an
account. Start with the free account. The Edu Basic plan is free for
teachers and students.
There are three easy steps to making an interactive image:
1. Choose a digital image – photograph or graphic
2. Add tags and link content
3. Share your ThingLink
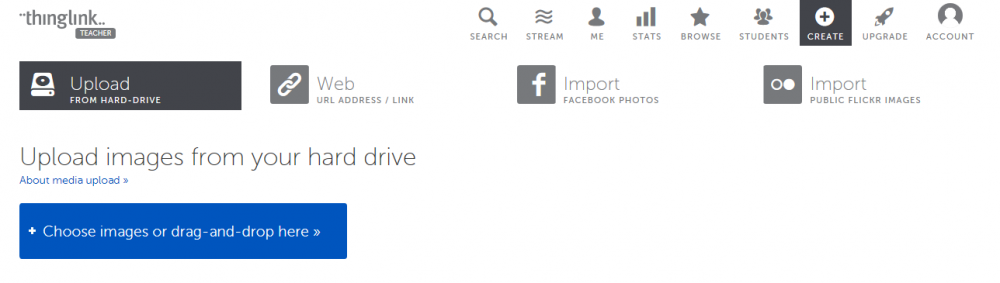
Step 1. Click “Create” to make a new
ThingLink, then upload a photo from your device, from the web, from
Facebook, or from Flickr.
Step 2. Personalise the photo by adding your
own text or links to any web content—sound files, photos, videos,
webpages—anything available online. Hover your cursor over the image and
click (or tap the screen of a handheld device) to add a tag from the
options given. Do the same to activate the tags—and voilà—a 21st-century
picture worth a thousand words is at your fingertips.
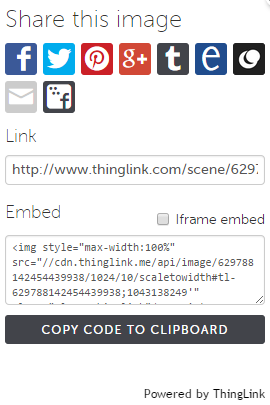 Step 3. Share your ThingLink interactive
image with others immediately. ThingLinks are saved automatically and
stored in the cloud. They can be edited anywhere, anytime, and are
updated immediately, with no need to reshare—a beautiful
thing! Step 3. Share your ThingLink interactive
image with others immediately. ThingLinks are saved automatically and
stored in the cloud. They can be edited anywhere, anytime, and are
updated immediately, with no need to reshare—a beautiful
thing!
Sample ThingLinks
Pannetone ThingLink
Oldest Mosque in Arabia
World Teachers’ Day
English Skills
Thanks to social media, taking and sharing photos has never
been more popular. Images shared via social media inspire
conversation—both virtual and traditional. Smartphones are ubiquitous,
and photo sharing is made simple with Instagram, Facebook, and Twitter.
ThingLink capitalizes on this global phenomenon; it lets users not just
share their photos, but personalise them by adding digital content to
the picture. Thus, a simple photo can become a digital presentation in a
matter of minutes. ThingLink is, quite simply, magic. |