4 Strategies to Make Your Push-In Model Effective
by Eman Magableh
 In English language push-in models, only so much
can be done in a very short amount of time—from teaching language to teaching
content. In push-in models, an English language professional brings the
instruction and any necessary materials into the content class of a
multilingual learner of English (MLE), as opposed to pull-out models, where
students receive English language instruction separate from their general
education classes.
In English language push-in models, only so much
can be done in a very short amount of time—from teaching language to teaching
content. In push-in models, an English language professional brings the
instruction and any necessary materials into the content class of a
multilingual learner of English (MLE), as opposed to pull-out models, where
students receive English language instruction separate from their general
education classes.
Because the push-in model aims to give MLEs equal
opportunities with general education students by providing them access to the
same content knowledge, it’s important to provide your students with the
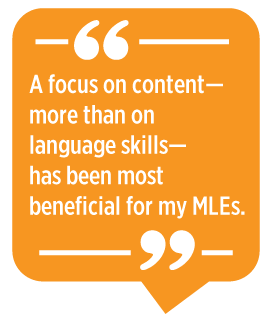
academic content they are learning. In my years as an English as a new language
(ENL) push-in teacher, I’ve found that a focus on content—more than on language
skills—has been most beneficial for my MLEs, especially given the limited time
allotted for language instruction. Following are strategies that I have found
work effectively in making the best of the instructional time in the push-in
model.
4 Effective Push-In Strategies
1. Teach Language in 10-Minute
Blocks
Instead of taking half or more than half of the
period on teaching a language skill or aspect, teach the language skill in 7–10
minute blocks by following these steps:
- Define the language skill or aspect in student-friendly
language. If your MLEs are at the starting level (e.g., CEFR
Levels A1–A2), you can translate the definition to their preferred
language.
- Provide two to four examples of the language skill
or aspect. Model the first example to show students what is expected from them
in producing the language.
- Give students an opportunity to produce the language
in pairs or groups. Give them feedback and focus on what they need support in.
2. Identify Key Concepts
and Make Content Comprehensible
Before teaching any text, whether it’s a language
learning text or a content-area text, review it to rephrase or substitute
difficult words and phrases. It’s important to provide learners with
student-friendly language that’s accessible to them. If you want to teach
certain target words, keep them for that purpose, and, during the reading,
pause and teach them. One of the most important questions before teaching a
text is to ask yourself, “What concepts do students need to know to understand
the text?” Then work on identifying the key concepts and scaffolding the
language so it’s at a level your MLEs can access. This strategy makes the
content comprehensible when students read it, even on the first read.
 3. Use Students’ Home
Languages
3. Use Students’ Home
Languages
Using students’ home (or preferred) languages is
one of the easiest and fastest ways to explain content to students at the
entering level. And even if you don’t know the student’s home language, you can
use a translation tool (e.g., Google Translate, the
say hi app, itranslate),
or allow students to use one, to ensure they’re grasping important
concepts.
4. Model Frequently
When teaching content, it’s crucial to model
concepts you want your students to understand and language skills you want them
to produce. Keep a dry-erase board with you to model sentences and annotate. If
it’s a complicated language aspect that needs to be modeled and you think it
will take a lot of time, show students a completed version of the
assignment/project.
Push-In Strategies in Practice: Example Lesson
Following is an example lesson implementing the
aforementioned strategies in a push-in English language arts class.
Grade: Grade 6 English
Language Arts
Model:
Push-in
Learners: 4 students,
proficiency levels starting to emerging
Lesson: The
Serena Slam
Materials: Rewritten
“The Serena Slam” text (1 for each student), printed cards with images
representing cause and effect, dry-erase board, chart paper (2)
Language Objective:
Students will be able to recognize cause and effect in the text.
Content Objective:
Students will be able to demonstrate comprehension by verbally summarizing the
text “The Serena Slam.”
Step 1. Prepare the
Lesson
Review the text you’ll be using for the activity
and rewrite it to suit the level of your learners. In this lesson,
“
The Serena Slam”
(Meagher, 2020) is rewritten for emerging level students (see the Appendix).
You’ll also need to create, print out, and cut up the cause-effect cards.
Step 2. Teach the
Language
Begin the lesson by teaching the language skill for
5 minutes. On the dry-erase board, write “cause” and “effect” and define each
word using simple definitions: Cause is why something is
happening, and effect is what happens. Write key words on
the board (because, so, and as a result) so students can refer to them later. Explain
that these words tell us when there is a cause and effect.
Show students an example by drawing a flower and a
rainy cloud. Ask them what makes a flower grow. The rain is why the flower
grows.
Step 3. Allow Student
Practice
Give students picture cards of things that happen
and the things that caused them to happen. Have students work together and sort
the pictures in pairs, or have them place the pictures under the correct column
on chart paper (See Figure 1). Model the first two examples by gluing them on
the chart while doing a think-aloud.
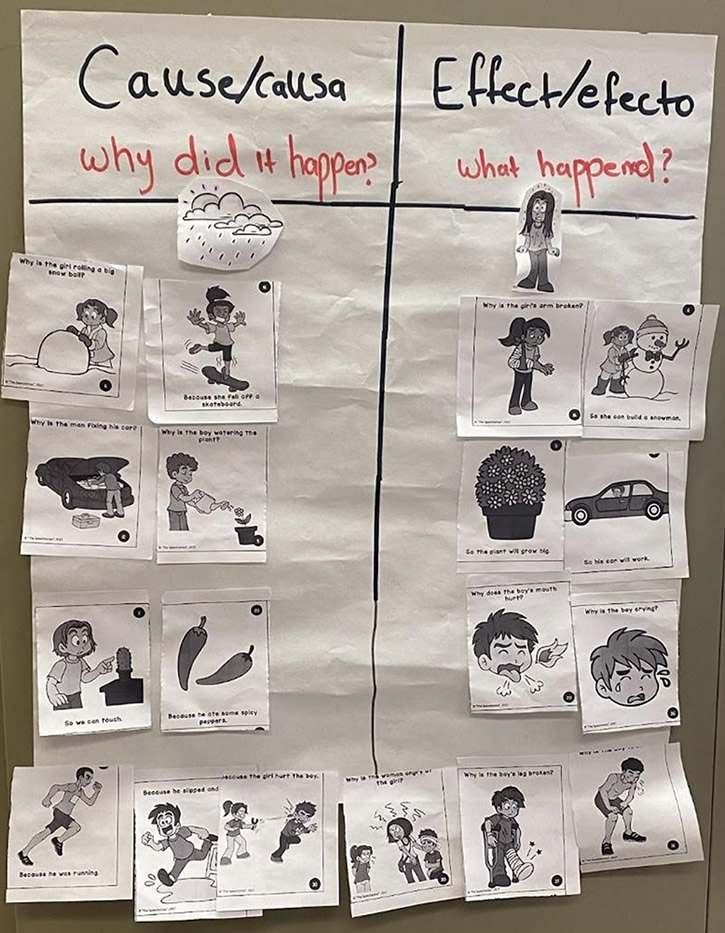
Figure 1. Cause and effect chart. (Click here to enlarge.)
Step 4. Introduce the Key
Concept
Shift to the reading. Before you begin reading,
introduce the key concept. In this example lesson, the key concept is the
Olympics. Write the key concept on the dry-erase board and ask students what
they know about it. Explain what it is and how it is connected to the text
you’re going to read.
Step 5. Read the
Text
Read the text aloud (Appendix). As they read along,
students should highlight key words (referring to the board if needed). Also
have them underline words they don’t recognize. As you read, pause occasionally
to observe their highlights and underlining, and you can explain the meaning of
words to them before you continue. After the reading, have students summarize
facts about Serena verbally.
Step 6. More Student
Practice
Once you finish the reading, model the placement of
a sentence strip, split into cause and effect, onto another cause and effect
chart. Give students sentence strips taken from the text and ask students to
sort them on the chart (see Figure 2).
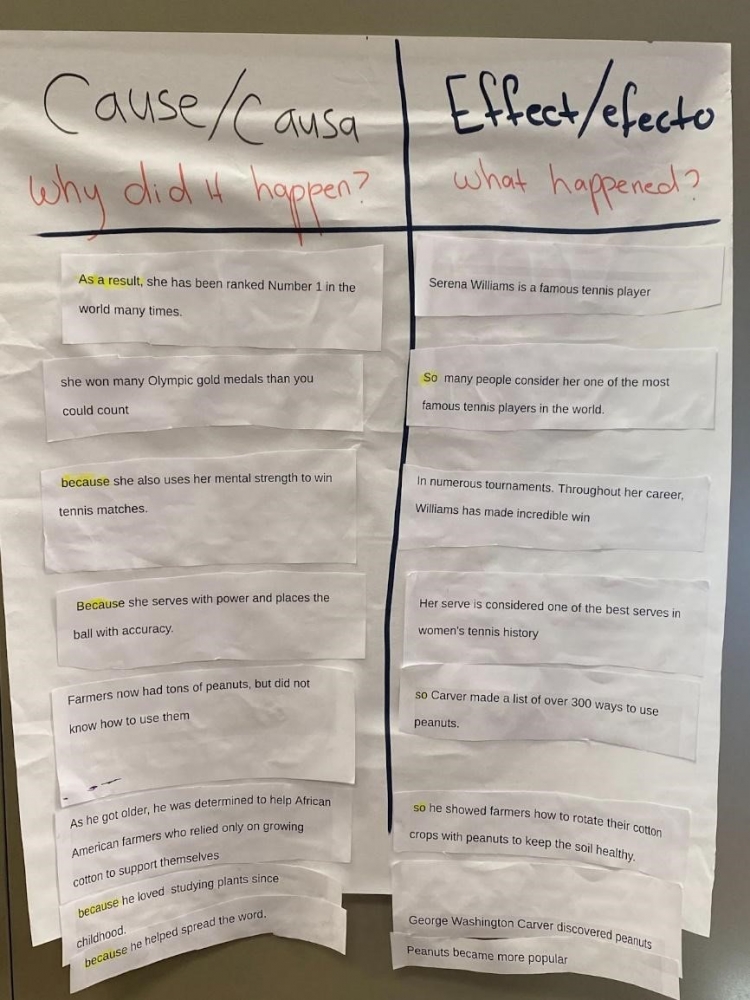
Figure 2. Cause and effect sentence strip
chart. (Click here to enlarge.)
A Note: Additional Scaffolding
When I last used this lesson plan, one of my MLEs
was illiterate. To meet his needs, I used Google translate to explain cause and
effect verbally, and I gave him headphones to listen to the translation. Then,
I asked him to cut and paste images (rather than sentence strips) and sort them
under cause and effect.
Conclusion
I have found these strategies to be super helpful
and easy to use in all push-in classes. What makes these strategies great is
that they need minimal to no preparation. I hope they help you better meet the
needs of your MLEs this school year.
Reference
Meagher, C. (2020). The Serena
slam. Readworks. https://www.readworks.org/article/The-Serena-Slam/a5458576-50ac-4730-a2b3-e774cdcf700e#!articleTab:content/
Eman Magableh is a middle school ENL teacher in New Jersey and is currently pursuing a PhD in literacy with a concentration in TESOL. She has an MEd in TESOL, advanced bilingual certification from the City University of New York, and a bachelor’s degree in English linguistics. In her previous years, Eman taught high school newcomers and students with interrupted formal education in New York schools. Her research interests are identifying the challenges that MLEs face culturally and linguistically and strategies that support multilingual learners.